Our Workflow Explained
Right, as my first proper technical blog I thought I would run through how we go from camera to print with information on the kit involved.
So first off I should have a quick run through the PC kit (yes PC not Apple, personal preference and all that..) within the workflow:
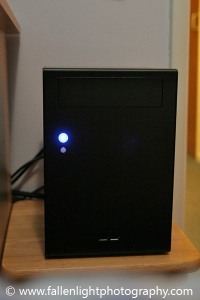
Main processing PC – ITX form factor, Intel Core2Quad Q9550 (2.83GHz), 8Gb DDR2-800, XFX ATI HD4650 1Gb, OCZ Vertex 60Gb SSD, Samsung F1 7200rpm 1Tb, Windows 7 64Bit, Twin Dell 2209WA 22″ IPS panels, Spyder3 Pro, Wacom tablet.
Storage – Synology DS1010+ NAS loaded with 5x Samsung 2TB hard drives in RAID5 configuration. Files are backed up to external hard drives and Blu-Ray media and removed from site.
Okay that’s that..
Basically the way we get images out from the camera to the customer goes like this:
- Create a new subfolder on the Synology NAS with a relvent name. Copy the Canon RAW files from the Sandisk CompactFlash cards to the folder on the Synology NAS using a the editing PC and a Lexar Pro card reader.
- Now, before I import the files into my chosen processing package – Lightroom 2 – I take a moment to force off a backup. First off a copy gets sent to an external hard drive, secondly a copy is burned to 25Gb Blu-Ray media (it is also worth backing up the Lightroom catalogues once editing is completed). Both of these backups are taken off site. ALWAYS backup. And where possible to as many separate mediums as it’ll stop you getting burned later in the event of a loss.
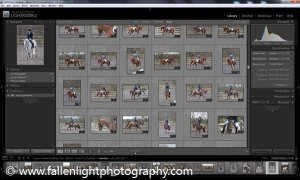
- Once in Lightroom I import the RAW files selecting the option to leave the files where they are (they’re already where I want them and I don’t want LR moving them). At this point it is also worth setting copyright tags, I have 2 preset copyright tags (1 for me and 1 for Gail) and photos get imported with these for our reference. I also set some basic keywords although I am yet to actually utilise these.
- Now the files are within Lightroom (and I’ve grabbed a coffee and found some decent music to drown out any destractions) I start the task of sifting out the bloopers. At this point it’s really personal preference what you do with the files, generally I’ll do basic re-cropping and any minor exposure tweeks if needed as the files for the time being are only going to be uploaded to the store at medium quality. Personally I use the flag system with LR, however I only use the “rejected” flag to mark the ones to get rid of later. I don’t use the “pick” flag, generally what’s left after the rejects I’ll keep anyway so it’s a little redundant.
- Now I’ve gone through and rejected all images that don’t “work” for one reason or another. Normally I’ve also gone cross-eyed at this point, for the most part I’ll spend 5-6 hours sifting through an average event with approx 800 shots but it’s the 1500+ shot events that are the killer! Another bit of advise if you’re processing this sort of quantity – buy a decent chair with good back support. You’ll thank yourself for that after several hours..
- Following that small public service announcement you should now have an album/collection full of unflagged and rejected images. I’m yet to delete my rejections, personally I am in no desperate need for the reclaimed space but if you wish (and you’re happy that your backup is working) at this point you could do so. However like I say I do not and I now have a collection full of images I wish to export scattered between those rejections.. So what I do is sort the album by pick type, select the first image to export then hold down the shift key and click the last image to export, now without clicking on any images re-sort the album by capture time. Hey presto you should now have all of your keepers selected and they’re in the right order (providing all of the photographers shooting remembered to sync the time on their cameras before shooting….).
- Still without clicking on any image (doing so will clear the selection on your keepers) now I go into the Export dialog to export the JPGs. I find for uploading to our store the default setting “For Email” works nicely as it offers a medium quality and an image resolution (600×400) that no one could sucessfully print from if they managed to save the photo from the internet. I also like to set the file naming to prefix with incremental numbers (0001, 0002, 0003 etc) especially if there is more than one photographer as their file sequencing will never be in sync, it just ensures that the files will go to the gallery in the correct order. The files then get exported to a temporary folder on the desktop.
- For images that are just going up to the store for viewing I now put on a watermark image into the bottom center of the frame, our store/gallery automatically watermarks all views in the gallery but we also offer Facebook image downloads which uses the original image. To batch watermark the image I use Faststone Photo Resizer, now don’t let the name fool you, the application has many many features and resizing (optional) is just one of them. I use the application to batch overlay a PNG watermark and spit the files out to a second temporary folder on the desktop.
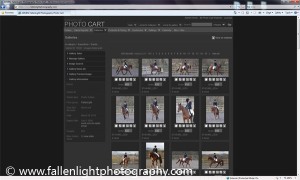
- Now we’re ready to upload the files to the store. So I now create the gallery within Photocart which automatically creates the folder on my webspace to FTP the files to. Once all of the images are uploaded a press of the “process images” button on the gallery within Photocart sees it grab all of the image data into its database and then they’re online and ready for purchase. At this point I normally clear out the temporary folders on the desktop.
- When a customer places an order Photocart emails me twice, once to say an order has been placed and another to say the order has been paid for (unless a cheque is being sent). So once the paid email has come in or payment has arrived in the post I log in to Photocart and view the order details, the images are then looked up within LR, checked for any final tweeks and exported as high quality JPG to a temporary folder on the PC (as they receive no further editing at this point they can be JPG). The files are then sent over to the printers.
And thats it.. The customer gets their prints a few days later.
I hope this if of some use to someone out there, please feel free to ask questions.
Cheers
Links (external sites – I hold no responsibility for their contents):
Adobe Lightroom
Lightroom Video Tutorials
Photocart Gallery and Sales Cart
Faststone File Resizer
About this entry
You’re currently reading “Our Workflow Explained,” an entry on FallenLight Photography's Blog
- Published:
- April 26, 2010 / 10:03 pm
- Category:
- Kit, Processing
- Tags:
- Adobe, Faststone, Lightroom, Photocart, photography, Processing, synology


 Share
Share


No comments yet
Jump to comment form | comment rss [?] | trackback uri [?]